Contents
CKEditor makes it possible to insert inline frames to a document. Inline frames, or iframe elements, allow you to insert a frame containing another document in the middle of your document.
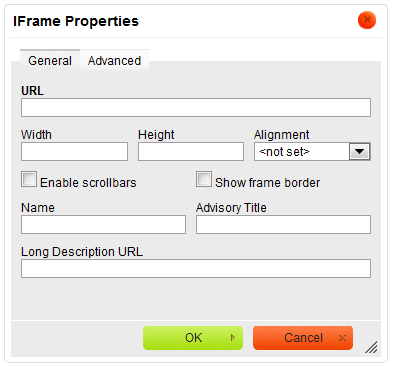
In order to insert an iframe, simply press the ![]() button on the toolbar. The IFrame Properties dialog window that will open lets you set configuration options that define the inline frame URL, its size, display properties, or advanced styling settings.
button on the toolbar. The IFrame Properties dialog window that will open lets you set configuration options that define the inline frame URL, its size, display properties, or advanced styling settings.
The IFrame Properties dialog window includes two tabs that group iframe options:
For general information on using dialog windows please refer to the Dialog Windows section of the User's Guide.
General
The General tab is the default tab that opens after you press the ![]() button on the toolbar. It allows you to set the
button on the toolbar. It allows you to set the iframe URL and configure the way it will appear in the document.

Below is an overview of all General tab elements:
- URL – the web address of the inline frame. The inline frame may be located on the same server as the web site you are currently in or on an external server.
- External server: If you want to use an external address, use the full absolute path.
- Example:
http://example.com/iframe.html
- Local server: If the inline frame is located on the same server, you can use a relative path that omits the domain name and starts with a slash.
- Example:
/pages/iframe.html
- External server: If you want to use an external address, use the full absolute path.
- Width – the width of the inline frame in pixels.
- Height – the height of the inline frame in pixels.
- Alignment – the alignment of the inline frame in the document. Available options are Left, Right, Top, Middle, and Bottom.
- Enable scrollbars – if this option is checked, when inserted content is larger than the space available in the
iframeelement, scrollbars will be displayed to enable the user to see the whole inline document. - Show frame border – if this option is checked, the inline frame will be displayed with a border.
- Name – the name of the
iframeelement (nameattribute). - Advisory Title – the text of the tooltip that is shown when the mouse cursor hovers over the inline frame (
titleattribute). - Long Description URL – the web address of an HTML page containing a longer description of the inline frame (
longdescattribute).
Advanced
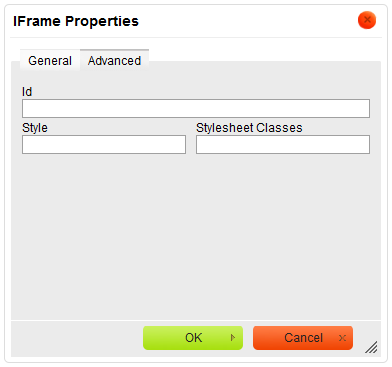
The Advanced tab lets you configure additional inline frame options such as assign it an ID, a class, or CSS style properties. It is meant for advanced users with knowledge of HTML as well as CSS, and gives nearly endless possibilities as far as the presentation of the iframe is concerned.

- Id – a unique identifier for an inline frame element in the document (
idattribute). - Style – CSS style definitions (
styleattribute). Note that each value must end with a semi-colon and individual properties should be separated with spaces. - Stylesheet Classes – the class of the inline frame element (
classattribute). Note that aniframeelement might be assigned more than one class. If this is a case, separate class names with spaces.
Using IFrames
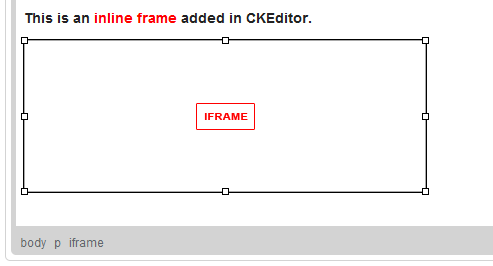
To insert an inline frame into your document, press the ![]() button on the toolbar. When the IFrame Properties dialog window is displayed, configure the inline frame settings, including the obligatory URL field and the display properties. Once you click OK, the
button on the toolbar. When the IFrame Properties dialog window is displayed, configure the inline frame settings, including the obligatory URL field and the display properties. Once you click OK, the ![]() icon along with the iframe placeholder will appear in the document.
icon along with the iframe placeholder will appear in the document.

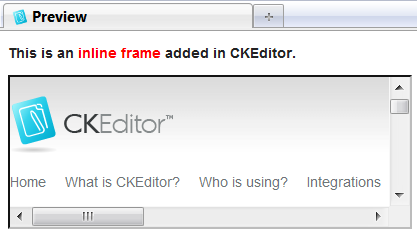
If you want to see the inline frame as it will be seen by the end user, use the Document Preview feature of CKEditor. After you press the ![]() button on the toolbar, the document preview will appear in a new browser window.
button on the toolbar, the document preview will appear in a new browser window.

In the example above the iframe element was set to show the CKEditor website in a 400px wide and 150px frame with scrollbars and borders.


